Feb 28, 2015

Getting Ready for a Little Milk Paint

We found the cutest little antique desk/table while out antiquin' today!  It has seen better days, but it's still in overall good condition.  The simple shape and those legs make this the perfect project for my new milk paint, Miss Mustard Seed's Mora.


This is the condition that I found it in.  It's been sanded, nailed and screwed, along with some duct tape residue.  One of the leg stretchers needed a little glue, but that was it structurally.


The handmade dovetails on the drawer date it back to around the early to mid 1800s.  


Since the finish on this is already gone and the surface has some issues and rough repairs - this is not a good candidate for refinishing without a lot of custom wood work.  Instead, it will get a softer makeover that will enhance all of it's little quirks.

While I'm writing this post, I'm chomping at the bit to get started...so I will leave you for now and go start the fun!

Pictures tomorrow!!

A Little Bit of Heaven - Visiting Miss Mustard Seed

This has to be the best birthday present ever!  As an early gift, my hubby gave me the day with the fabulous Marian Parsons - Miss Mustard Seed herself!  I got up extra early this morning and drove a few hours to just outside of Gettysburg, Pennsylvania to attend her Milk Paint 101 class.  Even though I've used her paint for several years, I learned a LOT!  And just to absorb some of her geniousness, even for a couple of hours, put a fire back in me that I've been missing for a little while.

I can't even begin to tell you how super down-to-earth and sweet she is!  I've met her a few times in the past at Lucketts, and she recognized me as soon as I walked in the door!


The class was small and it was fun getting to know the others.  She made every one feel special and spent so much time helping us.


After class, I took a few pictures around the studio.  I was too enthralled during class to snap any of the action, but here is some of the goodness she has there getting ready for Lucketts.


Can you say PURE GORGEOUSNESS????


Yes, a little bit o' Heaven! I've linked all pictures to her website.  If you have not visited her blog, yet - you are missing out on something special!

'til next time!

Feb 23, 2015

My Weekend Finds - More For Lucketts!

I didn't get to do a lot of shopping this weekend, but I did find a great antique oak drop leaf table.  I'm a sucker for oak, and this one is solid wood.


I also find it hard to pass up a good ladder back chair like this one.  It's in great condition, but I'll probably transform it with a little paint.


When the leaves are up, it actually forms an oval instead of round.  I love that!  The swing arms are made of pot metal - another great detail!


And look at those fluted legs!


I can honestly say that this table will not see any paint!  At least not from me.  All I had to do was clean it a little and wipe it down with some good ole' orange oil.  Now it shines and looks fabulous!  Especially with the old marks and patina.


This will be heading to Lucketts in May.  Believe me, it's hard not to keep it. :)

'til next time!

Feb 21, 2015

A Rustic and Refined Grain Sack Chair

Who else here on the East Coast is ready for Spring?  I sure am!  However, staying inside a warm and cozy house isn't so bad.  I did bend my rules and brought a small project in since the garage is below freezing right now.  I picked a chair that has been in storage for a couple of years.  It was actually one of my first experiments of painting upholstery....and I wasn't crazy about it.  So, up in the attic it went.

Even though the chair has elegant lines, I chose to use a European grain sack from my stash for a rustic and refined look.  I think it provides an interesting contrast of styles. 


When I was cutting up the bag, I found more lettering inside and I used that part on the back.  Since I sewed the back piece, I had to cut a split in the back to get it back on, so I used the drawstring to tie it back together.  I love this detail.


 The legs were first painted white, then I went over that with black chalkboard paint.  I distressed back in some places to the wood, while leaving layers of paint.  I used Miss Mustard Seed's White Wax on the black first, giving it more of a washed look - then finished it off with Howard's Citrus Wax in Mahogany.  I want to add here that Howard's waxes smell so good!!  Just like fresh oranges!


I wasn't sure what to use for the trim since I wanted to limit "formal", then I spotted the hem pieces off of the bag.  Perfect!

I love this chair.  I believe the styles compliment each other and provide a little bit of restyled charm.  Plus, I kept the covering a little loose, giving it a more casual, slipcover feel.


I am slowly, but surely, getting my stash ready for the Lucketts Spring Market and I think this one may make it in the pile....if I don't keep it by the fireplace permanently....

Here's a Before/After:


Thanks for stopping by!

I'm Linking Up:

Feathered Nest Friday at French Country Cottage
Frugal Friday at The Shabby Nest
Saturday Sparks Link Party at Pieced Pastimes
Share Your Style Party
Catch as Catch Can at My Repurposed Life
Make It Pretty Monday at The Dedicated House

Feb 18, 2015

Snow Days and a Chair

Yay!  We finally got our first real snow of the season!  Even though it's beautiful, I have to admit that after two days of it - I'm ready for Spring!

The bitter cold is once again preventing me from doing work outside, so I am bending my rules a little and brought in a chair from the garage to work on by the fire.  Look at those gorgeous legs!

Here's a little peak of the before,


It's getting a complete makeover that involves a little paint and a coffee sack!  Full post on it tomorrow.

In the meantime, I'll share some pictures from around our yard featuring our ~possibly~ one and only big snow this year.


This is nothing compared to what those up North are going through.  For everyone that is having to deal with snow and the bitter cold, be safe and warm!  Please don't forget about the fur babies!

'til next time!

Feb 16, 2015

Restoring An Antique Bread Board


We found this antique bread board buried deep in a shed on my mother-in-law's property.  We know that it is at least 100 years old because it is something left from when she was a little girl growing up in the now gone Hubbards Tavern - a historic tavern just a few miles away.  The legend is that General Washington would stay there when passing through the area.

I immediately knew that I wanted to save it and use it as a decorative piece.  I did a little research on how to properly clean it and I already had some Howard's Butcher Block conditioner on hand.

It was a dirty thing and goodness only knows what has crawled around on it.


I sanded it just a little to smooth out the splinters.  If I were using it in the kitchen for food, I would have sanded quite a bit.

To clean it, I scrubbed it down with some hot soapy water (may not be recommended for cutting boards to be used). After thoroughly rinsing, I scrubbed again with white vinegar and let sit for about 15 minutes, then rinsed well.  I repeated that process EXCEPT with peroxide, paying special attention to the cracks.  I may not be using it for food prep, but I am still a bit of a germaphobe.  I rinsed it again and set it to dry.

Looking much better.  A little trick I used was sitting it on top of a cookie rack to allow air flow to the bottom while drying.


I love the time-worn details.


I let it dry a little bit, then coated it with Howard's Butcher Block Conditioner (usually available at Lowe's).  The directions suggest wiping it down with hot water prior to using the conditioner to better allow the product to soak in, which I had done when cleaning.


I applied it to both sides wiping with the grain.


After letting it dry for about 30 minutes, I buffed it to a gorgeous sheen.


Now it sits proudly on our wicker trunk/coffee table in the basement.


This just goes to show that wood can always be restored, no matter how bad it may seem!

Thanks for stopping by!

Feb 15, 2015

Mr. and Mrs. Burlap Pillows and Sign

I thought it appropriate on Valentine's Day to share a project of love.  When I posted my silhouette project here, I received several comments about the pillows.  They are handmade and very simple to make.


I love working with burlap, and our straight up formal (sigh) bedroom needed some texture and fun.


I know it seems I have them backwards, but they are each placed on our respective sleeping sides and under our silhouettes.  I lost that battle years ago.

There are many different stencils available for purchase around, but I made my own for these.  I used Word and "Alex Brush" at 400 for the lettering on card stock and carved the letters out with my X-Acto knife.

I made very simple covers to fit the 12 x 12 pillow forms.  No zippers or envelopes for these since I can only sew very basic projects (but I'm getting better!).  After a little bit of pouncing on black fabric paint with a stiff stencil brush on the front piece, I sewed them up.

The stencils are reusable a few more times, so I took advantage and made this sign to hang on our fireplace.


I actually hand-painted this by tracing the stencil then filling in with white acrylic paint using an artist's brush.  I personally like this method better for signs.

Wouldn't both of these projects be adorable for a wedding?  Best part is that they can be customized with anything as long as you have a computer and a little bit of patience.

'til next time!

Feb 13, 2015

Ready for Spring and a Little Treasure Hunt

I'm literally going stir crazy!  We were teased last weekend with nice weather, only to return to the bitter cold quickly.  

I'm itching to get my hands on a big furniture project and because I'm a wimp when it comes to cold weather, not much is getting done right now.  The basement is too nice to work in since the makeover and the garage is not heated.  I've even put the dining room out of commission since I'm still cleaning up splatters of paint off of the hardwood floors from years of bringing my projects inside.  Shame, shame on me.

To help a little bit with my cold weather woes, I did get to go out on a little hunt last weekend and picked up a few things for the Lucketts Spring Market in May.


I am a sucker for antique children's chairs and was excited to find this pair of old bowbacks.  They each need a little work...and may get some paint....


Our daughter was a star softball player in school and now our grandsons are standouts in baseball - so I'm a Baseball Nana/former Softball Mom.  I love anything related to those sports!  Look at this cool old glove I found!


Can you imagine the stories?


Yup, I see a sports theme on this outing since I also can't pass up vintage racquets.  There are so many uses for them - but I really like displaying as they are.  Love them!


Here's a close-up of the racquet and press.  It just needs a little cleaning.


The plate rack just needs a little paint and some rubber feet.  I'm not quite sure where it'll end up...but I am thinking that it will be perfect to display some of our smaller pick-up items at the show.

Tomorrow promises to be close to 50 and sunny...so I'm hoping we can get out and do a little more junk hunting.  May is only 3 months away!!   YIKES!

Have a wonderful Valentine's Weekend!

Feb 8, 2015

Blah to Rustic Chic - A Vintage Mail Sorter

It seems that every time I turn around, I find myself with a piece from the 80s.  Let's face it, you can pretty much buy things from that period for little of nothing.  Though the practicality is usually there, the look is most often too dated for me.  This little mail sorter was one of them.


This is how it started out.


Not horrible...but not my style.

I gave it a couple of coats of antique white and distressed it with some sanding.  I added some accents by taping it off and painting on a couple of coats of chalk board paint. 


Now it has that rustic chic look that's perfect for our kitchen!


The slots can be used for a lot of things and the labels can always change.


The chalk board beside it was made from an old dresser mirror and hides our breaker box.  Perfect solution to hide those ugly necessities!


And you will always find a rooster or two around.


The kitchen is our next makeover project beginning very soon!  I can't wait to start tearing it up. :)

Thanks for stopping by!

Feb 4, 2015

Buttons and Ticking - A Valentine Pillow and Decor

Can you believe that it's almost Valentine's Day?  I feel like we were just sitting around the table having Christmas dinner.

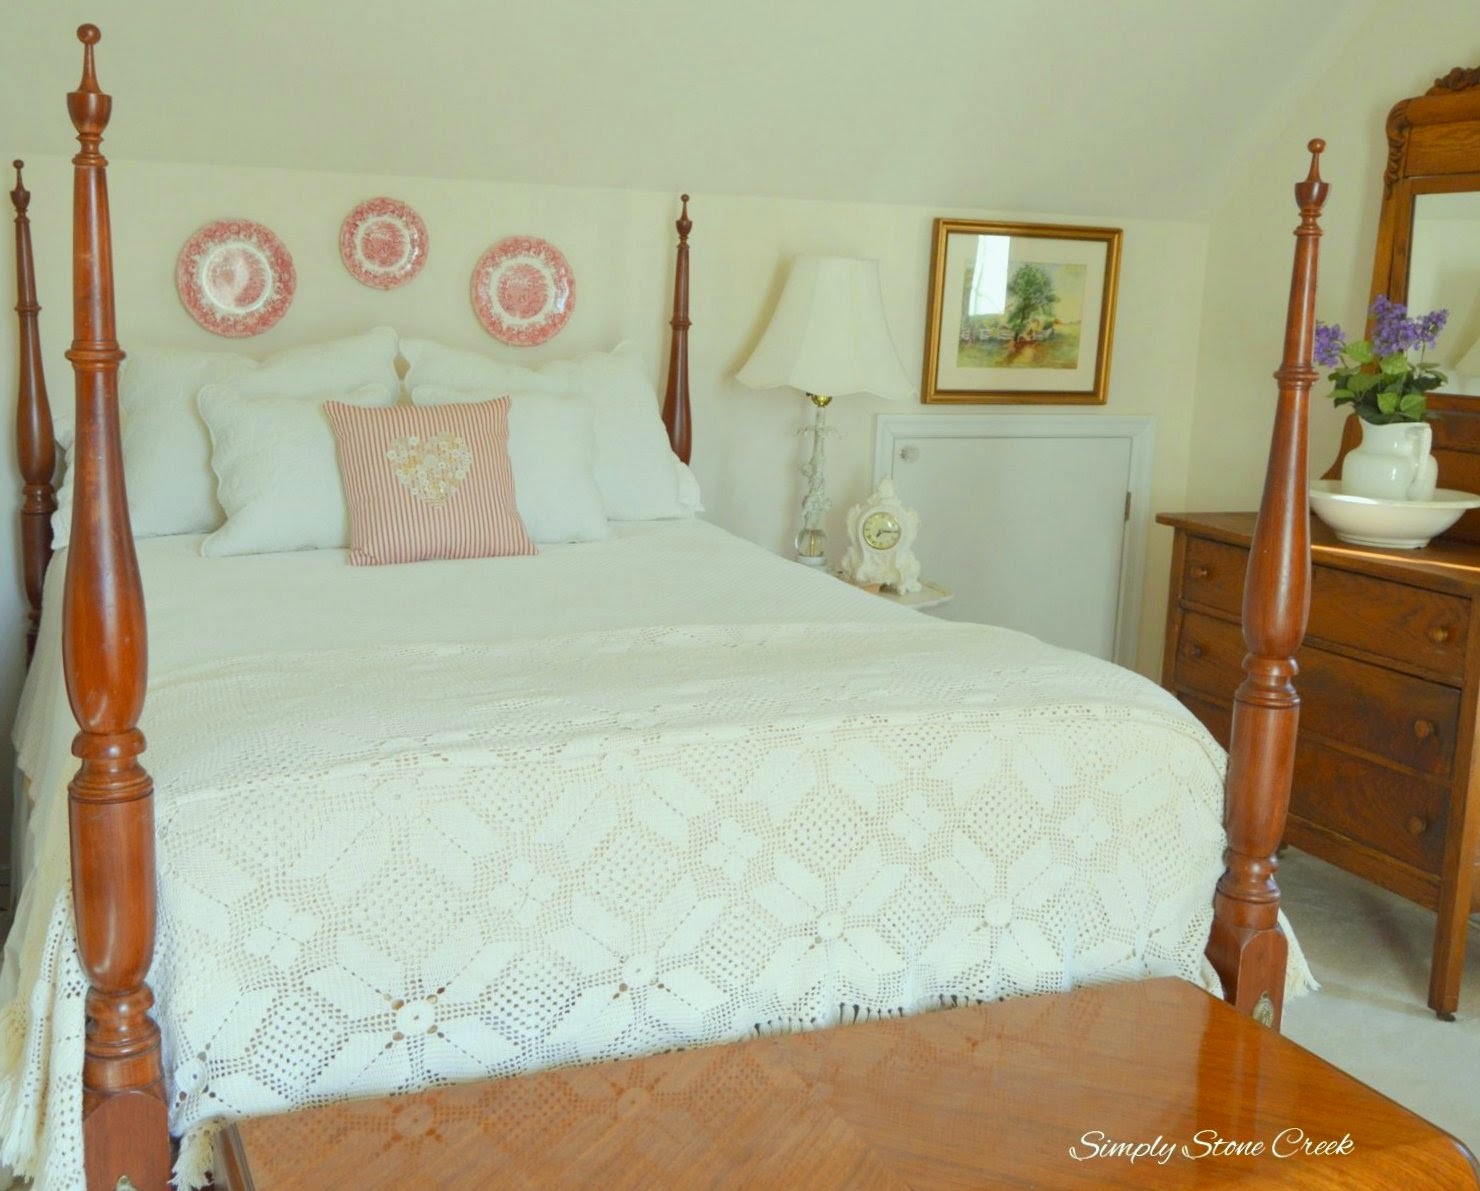
As I have read on so many blogs, this holiday is not a popular decorating occasion.  However, I couldn't resist prettying up a little in our guest bedroom - starting with this sweet pillow that I created today using old buttons and one of my Christmas Ticking pillows.


My mother-in-law collected these buttons for years.  She grew up in the 1930s, so she always had the mentality that "it might come in".  Well, she would be so proud of me for putting some of them to use!


Since I already had the pillow that I made for Christmas, all I did was hot glue the buttons on.


I think it adds just a touch of romance without going overboard.


I brought out some of my Alfred Meakin "The Courtship" plates to add a little more red. 


There's the Bondo table back in her place!


The adorable cherub lamp actually started out as a not-so-pretty brass-ish lamp.  


This bowl and pitcher is another heirloom from my mother-in-law.


The flowers are silk (shhhh), but I still love them until the real ones bloom.


There is no question, we have a very eclectic style out of necessity.  Since we brought a lot of Dean's mother's items into the house when she passed away, I have made them all fit in with our decor and hopefully look as though they belong where we put them.

For that, I'm sure she is very happy. :)


Linking to:

Feathered Nest Friday at French Country Cottage
The Scoop at Confessions of a Plate Addict
Show and Share Party at Coastal Charm
Treasure Hunt Thursday at From My Front Porch to Yours


                             Thanks for stopping by!                               

Sometimes, You Just Need to Look Past the Ugly....

Many, many times I will buy the most ugliest piece at auction - then be amused by the looks I get as I proudly walk out with my "prize...