Jan 31, 2015

Little Table Meets Bond.....Bondo That Is....

I'm loving the fact that I finally have some extra time to get projects done around the house.
This little table was one of them.


It's been sitting in our guest bedroom as a nightstand for years waiting for some TLC.  Other 
than a bad finish and a big chunk of the "pie crust" trim missing, it's in pretty good condition.


I could have had a woodworker make a replacement piece for the trim, but that would probably cost more than this little table is worth....so what did I do?  I pulled out the ole' Bondo to sculpt a new section.

Bondo is an automotive body filler, but I have seen Bondo for wood.  I haven't used that one, yet...but I am sure it's probably just as good.  The only complaint that I have is that it has a really strong smell.  Regardless, I LOVE this stuff and have done some pretty amazing restorations with it.  


It's a two-parter...the base gets mixed with a hardener.  Once mixed, there are only a very few minutes to work with it before it starts to harden.

After I roughed the area on the table with sandpaper, I slapped it on quickly.  Overkill is o.k. since it 
sands very easily and there really isn't much time to be neat.


I actually put a second layer on after this hardened to build it up.

Next was some sanding....and sanding....and a little more sanding.


...and some sculpting with a little more patching.  Then a little more sanding and sculpting.


I basically used what I had to shape it - including my fingernails.  Getting the lines straight was the most difficult part, and I literally did some of this with my eyes closed focusing on the curves with my touch.


This is what I ended up with.  I will probably do a little more carving before I paint, but I think it looks pretty darn good!  Paint will be going on tomorrow (before the Superbowl, of course!) and I'll share the after with you then. 

NOTE:  This is not a paid promotion....I genuinely use this product a lot.

'til next time!

Jan 27, 2015

The Basement Reveal!

We finished!  We finally finished!!  It took a lot longer than I expected, but the end result was worth the pain.  I am so happy with it!  Sure, there are some things left to do.  We really do want to finish the ceiling, but the white paint has brightened it up nicely for now. What I want is not cheap, so I'll be saving up.  Dean will be hanging a chandelier for me this weekend and we may even install a gas fireplace in the near future.  But, for right now, it's a place we really like to be! 

Remember what it looked like before?  NOT a place you'd want to hang out....


More on the before here and here.

Drum roll..... I LOVE it now!!


It's so bright and cheery.  I went with a farmhouse/retro feel because I incorporated some special items from Dean's family.

This door was salvaged from his great grandparents' old farmhouse.  Yes...that's original chippy paint!  The painting is by Sidney E. King, who was a nationally known artist and local resident.  He painted this one of the Old Sparta Mill, near where Dean and his mother both grew up.


The screen door grill above the TV was from my mother-in-law's house.


His aunt's vintage stereo/turntable has finally found its perfect home - and adding some pieces of my vintage paint-by-numbers really brightened it up!


This one was painted by Dean when he was young.  There's another one somewhere that I am determined to find!


A happy place for me to work out on the treadmill.  Now I just need to use it. :)


The French doors got a new coat of paint and dressed up a bit.


It didn't seem like we had a very long or difficult list initially, but boy, it was a lot of work.  I painted the ceiling with a paint sprayer - which I will never do again.  Very, very messy.  The concrete walls were left as is because I honestly love the texture and just painted them a nice khaki color with white trim.  We installed a carpet remnant which covered most of the floor.  It worked out perfect because we had already planned to tile in front of the door down to the stereo corner and also the back part of the room where the treadmill is. 

Here is our supply list breakdown:

Wall Paint - Valspar "Swoosh".   Free for this project - leftover from the construction of the addition.
Ceiling White Paint - McCormick White.  Free - also leftover from the addition.
Trim Paint -  Valspar "Bright White".  $12.50 qt
Carpet - Remnant piece from Lowe's - $104.00 (SCORE!)
Carpet Padding - $40.00
Tile - Two boxes -  Lowe's - $32.00 box of 30 x 2 = 64.00
Wood projects (Shelf on half wall, trim around door, corner molding and shoe molding) = $78.00
The chandelier and gas fireplace are both things we had already.
My hubby's skills and dedication = PRICELESS! 

TOTAL - $298.50

It's amazing how much warmer the basement is now, so hopefully it will save us a little on the heating bill.  I know Tiger is enjoying it!


It was a lot of work and patience...but we did it!  The best part was both of our grandsons and daughter absolutely loved it!  Jordan, the youngest, has already transferred his Army men down there. :)


Is it perfect?  No.  But it is so much nicer and an extra space in the house.  It was worth every penny and we do plan to invest a little more down there...but for now....it's a nice place to hang with the family.

I'll be linking up at


Thanks for stopping by!


Jan 21, 2015

Where Can You Find Us?

Since we closed our booth last month, I've been asked several times about where we can be found now.  In short, we are no longer located in a permanent space and will be concentrating our efforts on upcoming Vintage Markets and Shows.

We are so excited to announce that we will once again be at The Lucketts Spring Market at the Old Lucketts Store in May!  We debated about doing this again since the weather has been a bit of an issue the last few years....but we are holding strong that this year will be beautiful!  Plus......IT'S LUCKETTS!  The dates are May 15-17, 2015 (yes, they added a day this year!!).  This event has grown tremendously over the years and we are so proud to be a part of it again.

A glimpse of our tent last year.


See the "pond" in the distance?  That was the result of a LOT of rain the week of and during the set up days.  It's actually one of their parking lots.

We are also hoping to be a vendor again at The Vintage Home Market  which is held inside one of the event buildings at the Richmond International Raceway in Richmond, VA.  This is one of my favorites shows to do and we are so lucky to live really close.  Plus, it's indoors and rain only seems to bring in more people.  Their Spring dates are May 2 & 3, 2015.

As soon as our basement is finished.....I will start my shopping and stashing for May.  I also plan to begin offering pieces for sale through our on-line store - Coming Soon!  I'm excited to fine-tune our business to include creating one-of-a-kind pieces and to be able to interact directly with our customers through these sales and the Vintage Markets.  This was something I dearly missed when renting spaces in antique malls.

As for the basement.....I'm seriously aiming to be finished by this weekend!!  Fingers crossed. It is taking so much longer - and Dean and I goofed off a little this past weekend.....but I did get him to work a little. :)


I made a horrendous mess down there today - my Wagner Paint Sprayer does NOT like Paint + Primer paint....so I'm hoping to finish the ceiling Thursday after I get a different paint.  I planned to finish the ceiling first, but then we decided we wanted to do beadboard....then we priced......so.....it's paint for now....  My goal is to finish the basement for under $300.00 and  I seriously think it will come in much lower.

BIG Mess.......


I really hope the next post about the basement will be the final reveal!  I can't take much more of this. :)  I think my blood pressure raised a little today trying to get not one.....but TWO paint sprayers to work.

The life of a DIYer....

Thanks for stopping by!

Jan 17, 2015

Little Boy Silhouette Makes Us A Pair

I am so excited to share my latest project with you.  I made my own silhouette!


Silhouettes have always been a favorite of mine since I was a little girl.  I can still remember visiting with my cousin, Laura Ann, and the times that we would make them of each other using a lamp and a dark room. When I ran across this little girl silhouette over the summer, I immediately recognized an uncanny resemblance to me and wondered if it could be....but, I'm pretty sure that this was not done by the hands of seven year old.  :)


Ever since, I've been trying to find a little boy similar to her to represent my better half, but was unsuccessful....so the only thing that made sense was to make my own.

There are no profile pictures of Dean as a young boy (that we could find) - so, I used the next best thing.  Our grandson, Jordan, who is a little version of him.  I took a picture of both of them from the side so that I could compare as I went along.

I "posterized" that using BlockPosters.com, then the tricky part was getting it to the size right.  I also tried to emulate the style of the girl so that the boy would be a proper match.  This part wasn't the typical print and cut because I had to adjust a little here and little there.


I first used black poster board, but didn't like it because it showed white on the edges, so I found some over-sized construction paper at Jo-Ann's.  It worked much better.  While trying to remove the original girl from her paper, I found that she has become very brittle.  Instead of risking further damage, I just traced and cut out a new one of her from construction paper - then used a few pieces of tape to adhere them both to 16x20 sheets of posterboard.  After that, I framed them in a beautiful pair of frames that I also found at Jo-Ann's for 50% off - plus a 15% off coupon ($20.00 for the pair!).

I absolutely LOVE them!


I added my handmade pillows to the bed to complete the story.


I really think that they turned out super cute and will definitely be hanging above the bed for a while.  Now I'm secretly hoping that these will become family heirlooms.  :)

Thanks for stopping by!

Follow my blog with Bloglovin

Jan 13, 2015

Basement Update and a Buffet Makeover

Happy Monday!  I wanted to give you a quick update on the basement reno and a peek at what I've been working on.

It hasn't been going a quick as I had hoped....however, I did get the walls painted and went shopping for supplies to finish it up this weekend (I hope!).  At first, I had planned to paint the floor, but we decided to go with carpet instead to insulate it a little better.  We SCORED big time at Lowe's with a very large remnant in the most perfect color for $104!!!!!  It's a nice quality and will cover most of the floor.  The padding was also a remnant and super cheap.  What the carpet doesn't cover, we'll tile the back corner where the treadmill is - and then carry it into the laundry room for the next phase.  Luckily, we've lived with the basement for over five years and know it's good and dry (knock on wood).  

What I did accomplish was transforming this gorgeous buffet - FINALLY!  It's been sitting in the basement for over two years because after we struggled to get it in there, we decided that it will never be moved again!  It is extremely HEAVY and solid.  However, this was a huge score at an auction and we paid very little for it.  Seriously.  Can you believe only $27.50?  Really!

Here are a few pictures.  It's not staged all pretty yet...I'm waiting to finish the room before the final reveal. :)  The TV has now been moved above it, but I have some concealing of the wires and boxes to do.


I painted it using General Finishes Milk Paint in Antique White.  I absolutely love that paint!


Look at the details!


This is how it started out.  I did love the wood, but it just didn't fit the decor I'm going with in the room.   I have mahogany all over the house, and this is the one room I want light and bright.


This was what it looked like when I was finished...but I didn't like the drawers showing through, so I took some fabric I had and lined the backs of the doors.  You can see the first coat of the color on the wall behind it.


Voila!  Much better!

I have a HUGE bolt of that fabric and it will be seen quite a bit throughout the room...

Here's the carpet!  I should have taken a picture of us carting this through the store...and squeeeeeezing it into our Explorer.


Dean has a four day weekend this week and we are going to knock it out!  We had the grandsons this past weekend and didn't get the chance to work on it much....and priorities are always with the family!  :)

'til next time!

Jan 5, 2015

Make It Monday! Deer Head Silhouettes on Pallet Wood

I'm going back to our "Make it Monday" posts!  Today I'm sharing the "how to" on our most popular items this year....painted deer head silhouettes on reclaimed pallet wood. We didn't start making these until the Lucketts Holiday Market in early November, but since then, we have been selling them like crazy and filling custom orders.  I've been asked quite a few times about how we do it....well, here you go!


The construction part is done by Dean.  He just cuts the boards off of the pallets with a Sawzall, measure and cut to length and arranges them to where they look good.  This is a total preference.  We sometimes go really rustic or to a more defined style....just depends.  He uses both Liquid Nails adhesive and a nail gun to put them together. 


Another image of the backside.


As far as the stencil, I make my own.  I chose a graphic of a deer head that I liked and uploaded it to Blockposters.com so that it could be blown up to a poster size. This is such a great site!  I used a deer head for these, but there are so many other options out there!


Blockposters is very self-explanatory and once I selected the size I wanted, I saved it in .pdf format and printed it out on cardstock.  Once printed, I taped it all together and cut it out.  Voila!  You have a stencil.  Use it like any other!  When painting, I use a variety of methods.  I first start with a stencil brush and pounce around the edges to get the outside done, then take the brush and sweep the paint in the middle, then from the outside in.  This smooths it out.  After that's dried, I usually take an artist brush and do the fine details.  I'm sure there are many ways to use stencils, this is just how I do it.

It's not beautiful, but it works!  This one is the large size.


We made the natural wood ones for the shows and shop, but we also received a lot of custom orders.  Here are a few variations.  I love them all!

This one was painted using Real Milk Paint Company's Red.  It's a very nice barn red.


See how Dean leaves the old nails in?  As long as they are not falling out, they stay.  I love how it makes the wood look even more rustic.  Placing the stencil can be a challenge.  I can't always get them perfectly centered because I try to fit the nose on a single board rather than splitting it.  Every pallet seems to have different width in boards, but that keeps it interesting. :)

This one was painted brown as requested.  I used two different shades to create a rustic tone.


This custom order included a personal touch!  More possibilities!


I hope I was able to give you some inspiration!  I'm already thinking ahead to Easter and also something special for my new basement space. :)

'til next time!


Getting Ready - Our Basement Makeover on a Shoestring Budget

This is going to be a difficult post for me.  Those that know me well know that I am a perfectionist in many things and as soon as I know someone is coming over, I get out the detailing supplies.  Because I can't stand anyone outside of the immediate family to catch me with a messy house, showing the world our basement in its current condition is not easy for this girl!  However, I know that the end result will be beautiful and will be completed with very, very little money.  Sure, I will eventually want to do the wood floors and finish off the ceiling, but I will be using a lot of material and furniture we already have for this phase.  Just wait!

OK...here we go....the MESS!!  Close your eyes if you wish!


The above is looking at the room coming in from upstairs.  A lot of the stuff laying around is going to Goodwill.  We are saving the sofa with a new slipcover and the server will be getting a gorgeous makeover.  It weighs a ton and has a LOT of storage space.

This is the other side of the room.  Full of junk (not the good kind)...some stuff we'll keep, some not.  Yeah...it's a mess!  Paint splatter is all over the floor...but, I have a plan for that.


As you see - there's Molly...this is why she and Tiger are kept apart.  He is on the other side of the couch and well....she is just being mean. :)

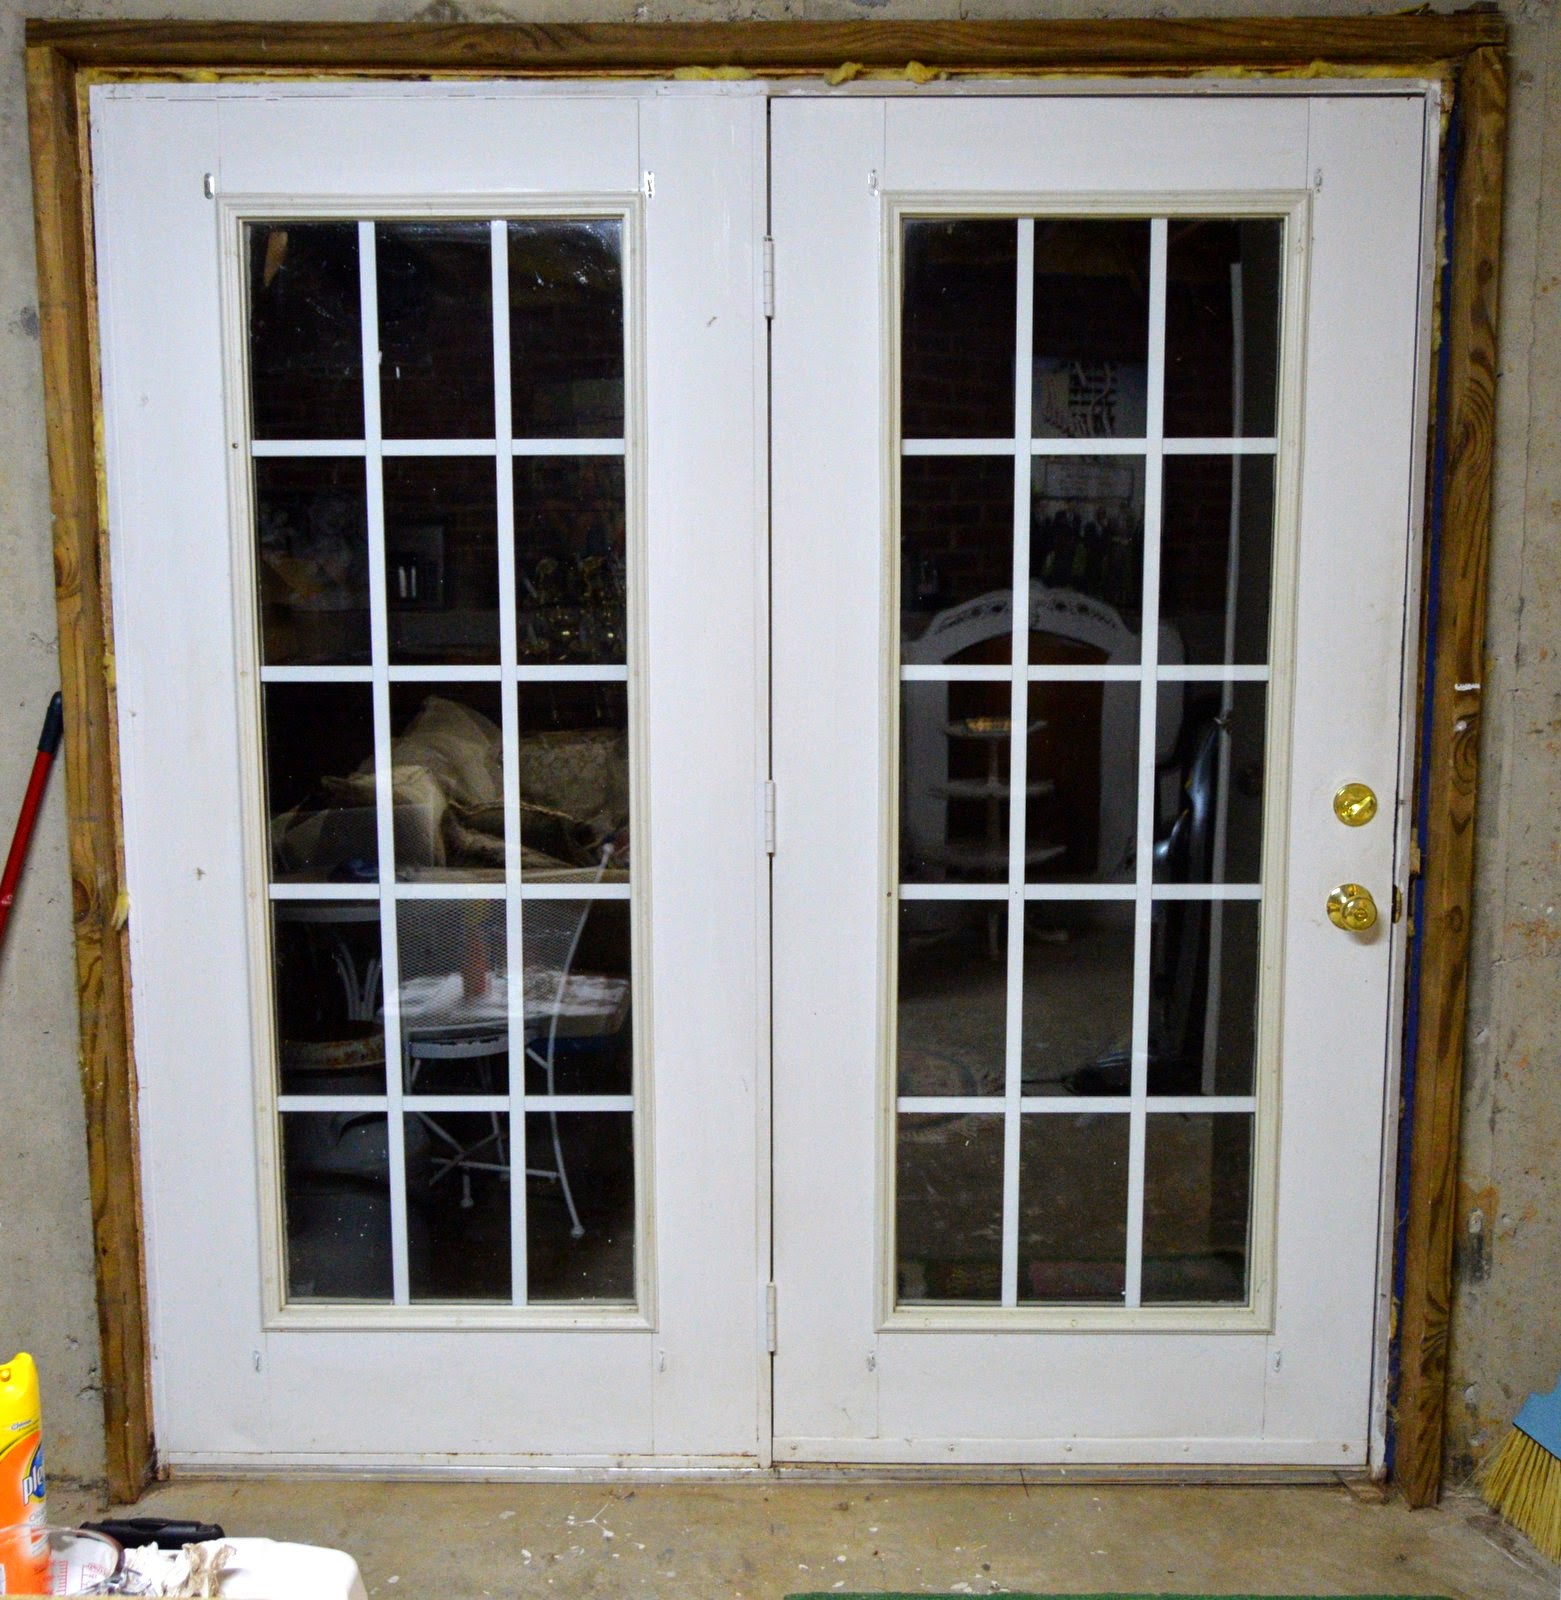
I love the fact that we have french doors leading to an outdoor patio.  We actually reused these from the original part of the house where they lead out to our porch before the addition.  A little paint, trim and real window coverings and they will be gorgeous. After this, I hope we actually start using the patio!!


Just look at how pretty it is from the outside!  It's time for the inside to be just as gorgeous.  The backyard is a steep hill and we are lucky that we have a little usable space back there.  Because we have a walk-out basement, it gives us a lot of natural light through the doors.


We built this addition about six years ago which consists of a large family room with cathedral ceiling, a breakfast room off of the kitchen and the unfinished basement and laundry room.  Originally the basement was going to be the "Man Cave" - which is why there is a lot of Cowboys crap (I'm a Redskins fan....) and man-related collectibles...  Dean has decided he doesn't want the room now (he is VERY comfy in the family room), so it's going to be MY little haven!!  Yay!!  It's going to be light and bright, rustic and chic.  Yes, I am going to use some of the vintage inspired posters and we have a REALLY cool Coke sign with "Deano's Diner" that I have the perfect place for.  :)


How cool is this sign?  We picked it up when we went to Luray, VA for our anniversary years ago.   It'll be going over Dean's mom's vintage turntable/stereo in the "music corner".  I'll also finally get my treadmill in a place where I'll actually want to be!

The Laundry Room is just off of this room....that will be next.  I can't bear showing that room just yet....

Tomorrow will be a sunshiney day - and I'm hoping to get the cleaning and purging done so that I can start spray painting the ceiling with my Wagner paint sprayer.


After that mess is done, I think that this will be a fairly quick project!  Stay tuned!!

Jan 2, 2015

2014 in Review.....A Few of My Favorites!

2014 was filled with a lot of activity for us and the business.  There was always something going on in the shops and the shows at the Old Lucketts Store, The Vintage Home Market and the Fredericksburg Flea.  All great times!

I couldn't finish out the year without highlighting some of my favorite pieces we did.  Here are a few...

**********

One of my all time favorite transformations was for the Lucketts Spring Market.  I used Miss Mustard Seed's Milk Paint in Boxwood on the table and server and I LOVE the mix of the green with the wood tops and chairs!!  Lucky for me....the server didn't sell and is now sitting proudly in our breakfast room. :)  Probably my favorite piece in the house.


This is another of my favorites and a one-of-a-kind piece.  I used General Finishes black milk paint over a white latex for this and found these adorable metal star knobs for more patriotic flair.  It sold before I could even get it in place at the shop.


We did a lot of white in our space at Through the Garden Gate and added in pops of color.  No question, white sold fast there!  I do love this set and they did not last long.


Another favorite piece using Real Milk Paint in French Grey.


A classic reDesign from a 1980s Thomasville bookcase.  Another piece I'm lucky to have been able to keep. :)


Another project using Real Milk Paint Co.'s French Grey.  Loved how the paint chipped!


These were by far the most popular creations of the year.  I will be doing a post this week on how we make them using reclaimed wood from pallets.


Not exactly business related, but I have been blessed to have my Molly for another year.  After being diagnosed over 2 1/2 years ago with bone cancer, she is still doing well.  She is getting close to 20 years old...and I'm beginning to see a few signs of her old age.  However, she still loves to snuggle and play and continues to amaze us and her doctors daily. :)


Probably the greatest accomplishment of the year!  We cleaned out the garage and are now able to get the "good" truck and this past week - we moved the 1965 Mustang back in!  The garage was packed with so much stuff for almost two years after we closed the store and literally could not walk through it.  We continue to make improvements and are hoping to insulate and finish the upstairs this year.  Happy for baby steps!


This year is going to be different than any other for Stone Creek!  Our time will be spent developing and defining our brand and continue to grow personally and professionally.  We have purged and cleaned up so much around the house, garage, sheds and yard....nothing feels better to me!  Here's to the New Year and great things to come!


Sometimes, You Just Need to Look Past the Ugly....

Many, many times I will buy the most ugliest piece at auction - then be amused by the looks I get as I proudly walk out with my "prize...